|
High load/stress areas
|
|
|
Tears at hardware installation points
often indicate a problem with the way the sail is set. Reef points tearing
out indicate the tack and clew were not sufficiently taut to support the
center points. Tears at jib hanks could mean the luff was not sufficiently
tensioned. Torn batten pockets are often results of the batten not being
snugly held in the pocket or the sail being allowed to flog. Try to re-set the sail in a way that minimizes the
loading or chafe in that spot. |
|
Shape
|
|
|
If your sail tears from luff to leech,
your repair should duplicate the same broadseaming or curve that was
originally built into the sail. Try to match the original seam edges
together and tape temporarily to hold the shape while you apply sail repair
tape or sew the seam. |
|
Know your sails
|
|
|
Become familiar with all of your
sails. Check your sails carefully before any voyage and analyze possible
wear or failure points. Include in your sail repair kit the various types of
cloth and hardware appropriate to your particular sails. If you want help,
call to make an appointment to bring your sails in for evaluation and
recommendations on repair kit items. We are happy to advise, repair, and
assemble a sail repair kit appropriate for your specific boat and travel
plans.
|
|
Preventative Measures
|
|
|
Once you have analyzed wear and failure
possibilities, consider preventative work to reduce the risk of catastrophic
failure later. Sacrificial patches at high-wear areas such as spreaders and
pulpits can save many anguished hours at sea. Remember that the spreaders
will chafe a different part of the mainsail when it is reefed. If you plan
to spend considerable time reefed, you might add spreader patches to protect
the reefed sail as well. Leather at hardware stress points will decrease the
chafe of shackles through rings, reef lines across mainsail leeches, and
hanks or slides rubbing on boltropes. Consider re-stitching or triple
stitching seams, especially at the leeches of mains and jibs. Flogging or
chafe from topping lifts or shrouds can cause subtle, but significant
damage. |
|
SPECIFIC AREAS OF REPAIR
|
|
Seaming
|
| |
Observe how the sail
was originally constructed in an area similar to that being seamed. Consider
whether the original method of construction needs reinforcement. If so,
cover the cloth edge with a piece of adhesive backed Dacron cloth and
re-sew. If the thread is worn or sun damaged, it can be re-stitched by
machine or by hand.
Insure cloth is
salt-free and dry. Treat with alcohol to displace moisture,
if necessary. Remove old thread pieces.
Pin out seam in
original shape. Use needle holes, wear pattern, etc. to re-establish the
original relationship of cloth edges. If the seam is not split yet, but
is in danger of coming apart, FIX IT NOW! To do so, run pencil along
seam edge, draw strike-off marks, then pull the seam apart and remove
the broken threads.
Pin the seam out
and put double stick tape on the bottom layer of cloth, pull off paper
backer, and lay top cloth in place. When you are sure it is lined up
correctly (no ripples in one layer, even tension on both pieces, ends of
seams are same lengths as original), press top cloth down firmly
smoothing cloth into place.
If sewing by hand,
sew / / / / /, then back in opposite direction, using original holes, to
form a zigzag stitch. This allows the stitch line to stretch with the
cloth. If necessary, punch holes through thick areas of cloth with an
awl. Use the awl to mark off holes at regular intervals of 1/4" or 3/8"
for even stitching. Use appropriately strong thread, doubled if
necessary. Pull tension on each stitch as you sew. If sewing by machine,
sew seam, using original stitch holes if possible.
Cover repairs with
adhesive-backed cloth tape if seam is in a high chafe area.
|
|
Patching holes
|
| |
ALWAYS FIX THE SOURCE
OF WEAR - Abrasion? Puncture by sharp object? Insufficient reinforcement for
strain on sail? Whatever it is, fix it to prevent further damage.
SMALL HOLES (LESS THAN
4") OR A STRAIGHT TEAR OF 6" OR LESS:
Repair small holes
in unstressed areas using adhesive Dacron tape or cut cloth.
Dry sails as
thoroughly as possible, using alcohol to displace moisture. Adhesive
does not stick well to damp cloth.
Cut two patches of
the appropriate size. The patch should extend beyond the hole by 2" to
3" in all directions.
Pin the area as
flat as possible using thumb tacks, or ask someone to kneel on the area
and secure it with his or her hands.
Lay the tape on the
sail and pin it or hold it in place. Remove the paper backer and press
down well. Turn the sail over and apply the other patch in the same
place. Rub down firmly.
LARGER HOLES OR TEARS:
Try to separate
long jagged tears into a series of straight lines. Most tears run
parallel to threads in the cloth.
Pin or flatten
area to be repaired. Line up the cloth in its original position. If this
is not right, the sail will not be flat. It is worth taking time to get
it right. Tape together with masking tape—just enough to keep the edges
together while you make the patch.
Draw the patch on
the sail. Keep lines parallel or perpendicular to threads in the cloth
if possible. Put double stick tape around line. Do not remove paper
backer yet. Cut around inside of tape with hot knife or scissors.
Use cloth that is
closest in weight to the original sailcloth. Lay it over the hole with
the threads aligned the same way as the original cloth. Pin it out flat
through the sail.
Draw the outside
edge of the tape (you can see the tape through the patch cloth). Unpin
patch material, lay it on a flat surface, and cut around line using the
hot knife and straight edge. The patch can also be cut with scissors;
run the hot knife along the cut edges.
Place patch over
hole, align everything, and pin down except for one edge. Remove tape
backer from this edge and press down patch. Work around patch until all
edges are stuck. Press down well. You can also make strike-off marks in
case the patch comes unstuck while you are sewing.
Sew around patch
as for seam repair. Use a small needle and a zigzag stitch.
|
|
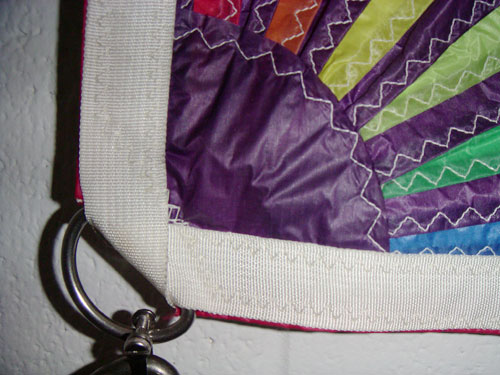
Hardware
|
| |
For problems with
hardware (slides, webbed rings, etc), try to duplicate original method using
hand sewing techniques. Punch holes first with an awl if necessary. Use palm
to push needle through cloth and pliers to pull it back through the
material. Avoid wiggling the needle to help pull it through the cloth. The
needle will break at the eye and/or the thread will chafe.
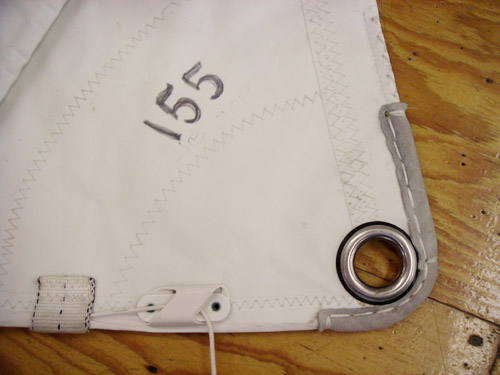
PRESSED RINGS:
If the fabric is partially intact, first try strapping the existing ring. If
that will not work, cut out old ring using the new ring as a pattern. Hot
knife edges of cut, tape web straps 7-14" long on each side of sail through
the ring, tensioning the webbing, as it will stretch under load. Ring should
be snug against the sailcloth when complete. Sew through sail and both
layers of webbing using zigzag stitch as above. Make awl holes to allow
needle and thread to pass through layers without abrading thread.
BATTENS
A. Inspect ends for roughness.
Sand or cover with end protectors or chafe tape.
B. Insure batten length matches
pocket so that end is in reinforced area.
C. Tape pocket tears with duct
tape minimally until you can repair properly. |
|
SAIL REPAIR KIT SUGGESTIONS |
|
COASTAL NECESSITIES KIT |
EXTENDED VOYAGE COMPLETE KIT |
|
SEAMING PALM, best quality |
#2 SPUR GROMMETS, CUTTER, 3/8",
SETTER, # 2 |
|
HAND SEWING NEEDLES, assorted
sizes(20) |
FID, Wooden, 6" |
|
SHEARS, 8", bent trimmers |
STAINLESS STEEL SHACKLES: 3/4",
1" |
|
AWL, 2 1/2" |
LEECHLINE CLEATS: ALUMINUM |
|
SEAM RIPPER |
BATTEN MATERIAL, to match
existing |
|
HOT KNIFE, BUTANE, cloth
cutting tip |
BATTEN POCKET ELASTIC, 1 1/2" |
|
STAINLESS STEEL "O" RINGS:
1 1/4" x 1/4" and 2 1/2" x
3/8" |
DACRON TAPE: 3"x 3.9 oz, 6"x 8 oz, 2"x 5 oz,
3"x 8 oz, 6"x 8 oz |
|
STRAIGHT EDGE RULER, 1 meter |
6000 LB JACKLINE WEBBING, Type
18, 1" |
|
SEAMSTICK TAPE, 1/2" |
LEATHER, Chrome pearl |
|
SEIZING WIRE, stainless, 1/16" |
TUBULAR WEBBING, Strapping, 1" |
|
WIRE CUTTERS, Felco |
ACRYLIC CANVAS, 60" |
|
ADHESIVE DACRON TAPE: 2" x 2
oz, 3"x 3.8 oz, 6"x 8 oz |
REPLACEMENT HARDWARE to match
existing: SLIDES, SLUGS, HANKS, PROTECTORS |
|
SPINNAKER REPAIR TAPE: 2" x 25' |
LEECH LINE, Dacron, #505, 1/8",
Kevlar, or Spectra |
|
UV Resistant THREAD, V92,
bobbins or spool |
UV Resistant FLUID, "303", 8 oz
pump spray |
|
Waxed Handwork THREAD, V346 |
RAWHIDE MALLET, # 1, 2 1/2 lbs. |
|
RIGGING TAPE, Self-bonding, 1"
x 15' |
ALCOHOL (first for the sail,
then the sailmaker) |
|
|